


I’ve been running Homebrew on my Wii for quite some time, which also gives me the ability to play backed up games from a USB hard drive. There’s several advantages to this; I don’t have to worry about changing DVDs anytime I want to play a game, in addition to not having to carry them around. Additionally, having the games loaded from a USB hard drive decreases the time it takes to load games.
I needed to keep a log of all the steps I had to take in order to get this functionality working, so I figured I might as well be helpful and provide a list of the steps needed to do so.
The only thing I ask is that you don’t follow these methods to pirate games. It’s wrong and it cheats developers out of money they deserve. Homebrew is there to help enhance the functionality of the system, not for free games. So please use it wisely and don’t abuse the system. It’s all on the honor system here folks.
Prerequisites:
- External USB Hard Drive
- Homebrew Channel already installed (See Twilight Hack if you have system 3.4 or less, Bannerbomb if you have 4.0-4.2, or LetterBomb if you have 4.3)
Step 1 – Install cIOS38 (if already installed, skip to Step 2)
- Download cIOS38_rev14 (you can find it here)
- Extract and rename “cIOS38_rev14-Installer” to “boot.dol”.
- Create a folder named “cIOS38_rev14″ under the /apps directory on your SD card and copy the extracted “boot.dol” file to that folder.
- If this doesn’t work and the installation fails, you need to download the Trucha Bug Restorer for your system. Try that and attempt to install cIOS38 again. Please note that this step may brick your Wii! I highly recommend you go ahead and install BootMii in boot2 and back up your NAND before attempting this portion. Doing so will allow you to recover should anything go wrong, otherwise you are continuing at your own risk!
Step 2 – Install a USB Loader
There are a couple of different USB Loaders available. Personally I use Configurable USB Loader, but you may want to pick a different loader that has other features you may like.
- Follow any included instructions, otherwise you may only need to copy the extracted folder into your /apps directory on your SD card.
Step 3 – Format Your Hard Drive
You may want to partition your hard drive if you want to separate your Wii files from anything else you may have on there. Most loaders now support FAT32, but there are others that support NTFS as well. If you want to use NTFS you will need to check with your USB Loader to ensure that it supports that format as a feature.
- If you want to partition your hard drive, you may want to try and download a partition manager like GParted. Otherwise you can use the whole hard drive.
- If you decided to use GParted, simply partition the hard drive and format the partition you want to use as “FAT32″ and continue on to Step 4.
Step 4 – Install & Run Games
The following steps may differ depending on which USB loader you installed (I’m using Configurable USB Loader).
- Launch the homebrew channel and your recently installed USB Loader.
- Select “USB Mass Storage Device”.
- Insert any game disc, and press “+” to install it. This may take some time depending on the size of the game.
- Repeat last step for each and every game you want to install.
- You’re now ready to play your backed up games! Just select your game, and press “A” to begin.
Some of the USB Loaders will automatically download game covers, and others don’t. If you downloaded one that doesn’t you can find them here. It’s only 40mb to download 450+ covers, so you might want to do it anyway just in case.
If you have any issues with the above steps, please be sure that you remove any and all GameCube memory cards. It seems some Homebrew stuff has issues with the memory cards in place when you’re trying to install.
I tried to be as detailed as possible and cover as many angles as I could, but I’m bound to have missed a thing or two. If you are attempting to follow this guide and are running into some issues, or I seem to be missing a vital step, leave a comment and I’ll try to address it as best as I can.
As a bonus, here’s what it all looks like using the loader I tried. Please note that the above steps will not create a USB Loader channel in your main menu, but will need to be accessed through the Homebrew Channel. If you’re interested in doing so, you can follow this guide here which outlines the steps to create a USB Loader Forwarder Channel and creating channels from games installed onto your USB hard drive.
This is only a small piece of the pie of what Homebrew offers. There’s tons of applications and utilities available, not to mention the ability to play DVDs. You can find more details and information on everything over at WiiBrew.org.

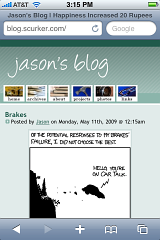 I’m probably the only one who would actually access my blog on an iPhone, but I’ve just now pushed out a design that should be better suited for mobile devices. I’ve optimized the design obviously for the iPhone/iPod, but it should work on other mobile devices like the PSP, DSi, or Android (fingers crossed).