Dolphin Emulator @ 720p

Tuesday, January 19th, 2010 @ 11:45pm

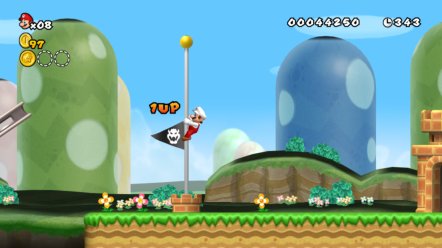
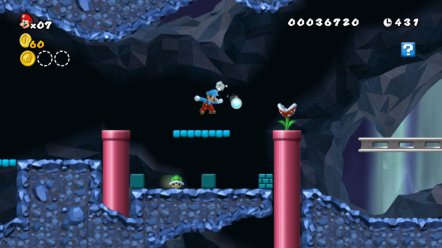
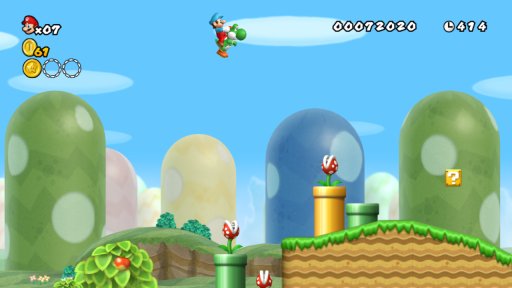
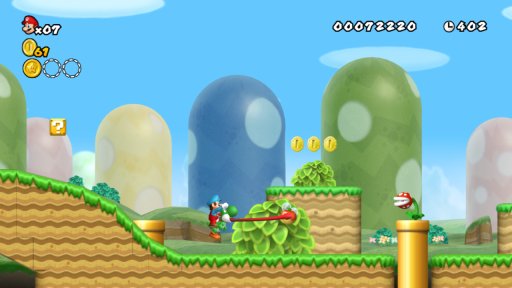
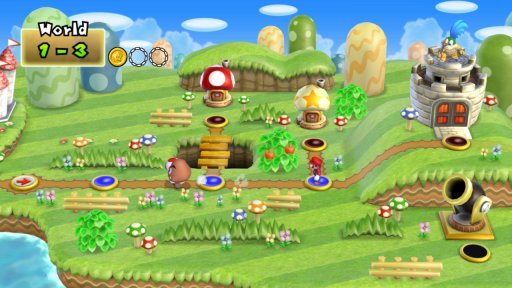
I’d tried the Dolphin emulator a while back, but wasn’t able to get it configured to run somewhat smoothly until recently. I finally have some decent screenshots of what Nintendo Wii games could look like in 720p (click on the images for the full image).

New Super Mario Bros. Wii

I was able to get NSMB Wii running at a somewhat consistent rate, usually around 40-50 fps. NSMB appears to be a good game to start with, since it is supposed to run pretty well on most any system with at least a 2 Ghz processor.

nsmb1

nsmb2

nsmb3

nsmb4

nsmb5

I tried a few other games, but didn’t have much success. Little King’s Story had graphical glitches galore, Super Mario Galaxy looked fantastic, but ran slow (i.e. 5-15 fps), and Mario Kart Wii did run, but had a few glitches and was a sub-par frame rate for a racing game (20-30 fps).

Creating Wii Channels from USB Loader

Thursday, August 27th, 2009 @ 9:23am

If you followed my previous post on attaching a USB hard drive to your Wii, you now should have the convenience of loading games directly from your hard drive without ever having to worry about swapping discs. Yet having to load the Homebrew channel, then going through to your USB loader can feel cumbersome sometimes. Getting channels to go directly to the games, or the USB Loader is easier than you would think.

You obviously need to have the Homebrew Channel plus a USB loader installed before you can do any of this. If you don’t, follow these steps then come back here once you’re done. Please note that the steps here can and might damage your Wii! I very highly recommend you install BootMii into boot2 and back up your NAND before attempting any of the following steps. Should anything go wrong, you have a backup you can fall back on, otherwise you are continuing at your own risk!

Prerequisite Steps

  • Download and install WAD Manager.
  • Create a “/wad” folder on your SD card (must be on the root of the card!) Any channels that you want to install must be placed here or else the WAD Manager will be unable to find them.

There’s two options from here on out, and you’re welcome to do both. You can just install a usb forwarder channel that will allow you to access your USB Loader from the main menu, or install channels for individual games so that they show up on the main menu.

Installing USB Loader Forwarder Channel

There’s quite a few USB forwarder channels out there, but they all do pretty much the same thing. A USB forwarder channel looks in specific directories for an installed USB loader and tries to run it. The advantage of this is that it makes it simple to upgrade your USB loader without ever having to mess with the forwarder channel, since you can just swap the boot.dol to a newer version.

To make things easier, you can download the one I use: Universal Forwarder Channel by Narolez. This forwarder looks in the following locations for a USB Loader boot.dol:

  • sd:/apps/usbloader_cfg/boot.dol
  • sd:/apps/usbloader/boot.dol
  • usb:/apps/usbloader_cfg/boot.dol
  • usb:/apps/usbloader/boot.dol

Forwarder Installation

  • Copy the .wad file to “sd:/wad”.
  • Load up WAD Manager in homebrew, find your wad, and choose to install.

You should now have the channel correctly installed, and should be able to access your USB loader directly from the main menu! If at any time you need to uninstall the channel from your Wii, you can follow the installation steps above, choose the same wad file, then choose to uninstall and the channel will be removed from your system.

Installing Channels for Individual Games

Installing games already on your USB hard drive is pretty simple, just be sure you already have the games loaded onto you hard drive via USB Loader. You also need to download CRAP in order to assist with the channel creation.

Channel Installation Steps

  • Plug in your usb hard drive to your computer.
  • Launch CRAP.
  • Select the drive letter of your USB hard drive, i.e. J:.
  • Choose the game which you wish to create a channel for.
  • Select a loader. Most of the time you should be fine with using USB Loader 1.6, but you may need to use a different loader depending on what options you want to apply to the channel.
  • Click on “create channel”
  • Your wad will be saved in the WAD directory of your CRAP folder, so you will need to copy/move this wad to your USB hard drive.
  • Plug your USB hard drive back into your Wii, load up WAD manager via homebrew, find the wad you just created and install it.
  • If at any time you need to uninstall this channel, simply load up the WAD manager, find your wad, and select “uninstall” instead of install.

You should now have a channel listed on your main menu for your game, and you can repeat the above steps for any additional games you wish to install.

There may be an occasional issue with a couple of games depending on what version of cIOS38 your are currently running. cIOS38 rev. 14 unfortunately breaks dual-layed disc compatibility, so games such as Smash Bros. Brawl or Metroid Prime Trilogy will not work in USB Loader. Wii Sports Resort will not work via the channel method if you >13 installed, so you may want to pick and choose what cIOS38 you are running based on what games you want to install as channels.

Happy Birthday Tetris!

Saturday, June 6th, 2009 @ 1:37am

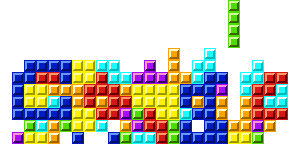
Google/TetrisToday, Tetris celebrates 25 years of addiction, pain, and suffering; and of course Google joins in on the fun with a sweet googlefied tetris logo.

In celebration of 25 years of Tetris, I present to you some of my favorite ideas inspired by Tetris:

And of course, no list would be complete without an online version of Tetris. Here’s to 25 more years of tetrominoes, “just one more”, a-type, and more! Happy 25th!

Wii Homebrew + USB Hard Drive

Friday, May 29th, 2009 @ 12:30am

I’ve been running Homebrew on my Wii for quite some time, which also gives me the ability to play backed up games from a USB hard drive. There’s several advantages to this; I don’t have to worry about changing DVDs anytime I want to play a game, in addition to not having to carry them around. Additionally, having the games loaded from a USB hard drive decreases the time it takes to load games.

I needed to keep a log of all the steps I had to take in order to get this functionality working, so I figured I might as well be helpful and provide a list of the steps needed to do so.

The only thing I ask is that you don’t follow these methods to pirate games. It’s wrong and it cheats developers out of money they deserve. Homebrew is there to help enhance the functionality of the system, not for free games. So please use it wisely and don’t abuse the system. It’s all on the honor system here folks.

Prerequisites:

  • External USB Hard Drive
  • Homebrew Channel already installed (See Twilight Hack if you have system 3.4 or less, Bannerbomb if you have 4.0-4.2, or LetterBomb if you have 4.3)

Step 1 – Install cIOS38 (if already installed, skip to Step 2)

  • Download cIOS38_rev14 (you can find it here)
  • Extract and rename “cIOS38_rev14-Installer” to “boot.dol”.
  • Create a folder named “cIOS38_rev14″ under the /apps directory on your SD card and copy the extracted “boot.dol” file to that folder.
  • If this doesn’t work and the installation fails, you need to download the Trucha Bug Restorer for your system. Try that and attempt to install cIOS38 again. Please note that this step may brick your Wii! I highly recommend you go ahead and install BootMii in boot2 and back up your NAND before attempting this portion. Doing so will allow you to recover should anything go wrong, otherwise you are continuing at your own risk!

Step 2 – Install a USB Loader

There are a couple of different USB Loaders available. Personally I use Configurable USB Loader, but you may want to pick a different loader that has other features you may like.

  • Follow any included instructions, otherwise you may only need to copy the extracted folder into your /apps directory on your SD card.

Step 3 – Format Your Hard Drive

You may want to partition your hard drive if you want to separate your Wii files from anything else you may have on there. Most loaders now support FAT32, but there are others that support NTFS as well. If you want to use NTFS you will need to check with your USB Loader to ensure that it supports that format as a feature.

  • If you want to partition your hard drive, you may want to try and download a partition manager like GParted. Otherwise you can use the whole hard drive.
  • If you decided to use GParted, simply partition the hard drive and format the partition you want to use as “FAT32″ and continue on to Step 4.

Step 4 – Install & Run Games

The following steps may differ depending on which USB loader you installed (I’m using Configurable USB Loader).

  • Launch the homebrew channel and your recently installed USB Loader.
  • Select “USB Mass Storage Device”.
  • Insert any game disc, and press “+” to install it. This may take some time depending on the size of the game.
  • Repeat last step for each and every game you want to install.
  • You’re now ready to play your backed up games! Just select your game, and press “A” to begin.

Some of the USB Loaders will automatically download game covers, and others don’t. If you downloaded one that doesn’t you can find them here. It’s only 40mb to download 450+ covers, so you might want to do it anyway just in case.

If you have any issues with the above steps, please be sure that you remove any and all GameCube memory cards. It seems some Homebrew stuff has issues with the memory cards in place when you’re trying to install.

I tried to be as detailed as possible and cover as many angles as I could, but I’m bound to have missed a thing or two. If you are attempting to follow this guide and are running into some issues, or I seem to be missing a vital step, leave a comment and I’ll try to address it as best as I can.

As a bonus, here’s what it all looks like using the loader I tried. Please note that the above steps will not create a USB Loader channel in your main menu, but will need to be accessed through the Homebrew Channel. If you’re interested in doing so, you can follow this guide here which outlines the steps to create a USB Loader Forwarder Channel and creating channels from games installed onto your USB hard drive.

This is only a small piece of the pie of what Homebrew offers. There’s tons of applications and utilities available, not to mention the ability to play DVDs. You can find more details and information on everything over at WiiBrew.org.

WiiMowing

Tuesday, April 7th, 2009 @ 9:14am

There have been so many interesting applications for the Wiimote, and here is a somewhat practical application used to control a lawn mower. Yes, that’s right, you can now mow the lawn using only a Wiimote. Observe: